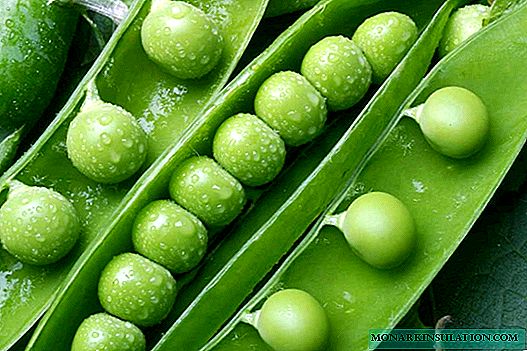
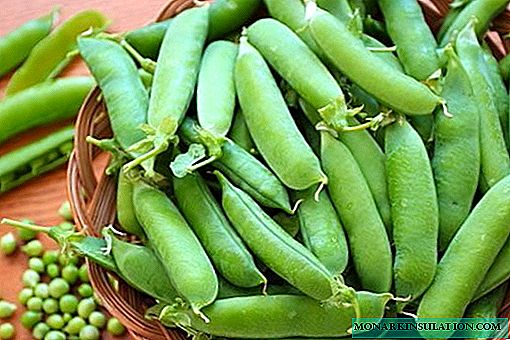
Almost every gardener grows peas in the garden. But on the windowsills, this culture is much less common. Although there is nothing complicated in getting the crop "in captivity", no. The plant is capricious, it does not require any special care. Of course, not all varieties are suitable for growing at home, but from the existing variety it is quite possible to choose several suitable ones. Most often, sugar peas are planted on the windowsill, in which not only grains are suitable for food, but also the beans themselves and peeling - it is highly appreciated for its taste.
Pea varieties suitable for growing at home
Peas at home are not the most common crop. Much more often on the windowsills they grow all kinds of greens and herbs. But in principle, nothing is impossible in this. Pea grains are not only tasty, but also very healthy. Its greens can also be eaten, this is a worthy alternative to lettuce.

It is quite possible to grow peas on the windowsill even to those who have never cultivated it in the garden
For growing at home, choose low-growing varieties from the category of sugar or shelling. In addition to compactness, they have another advantage - more succulent leaves than grain peas.
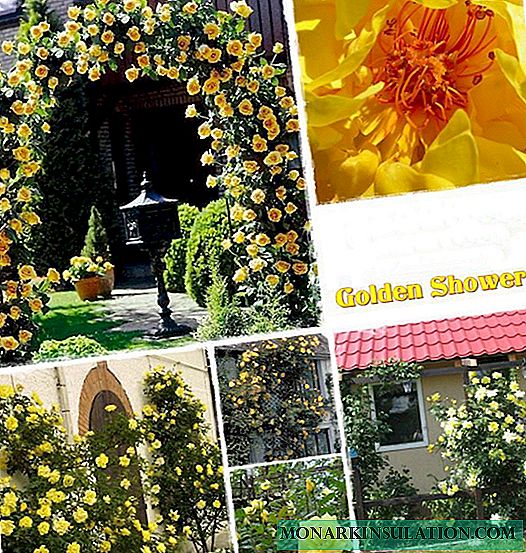
Of the sugar varieties, the following are most popular:
- Ragweed. A relatively recent achievement by Russian breeders. It is specially noted that it is very well suited for fresh consumption, for preparing all kinds of culinary dishes. A variety from the early ripening category, the crop ripens in just 45-55 days. Plant height reaches 50-70 cm. Beans with a slightly pronounced bend, sharpening to the apex, long (8-10 cm), slightly flattened. They are painted in a salad color, there is no hard "parchment" layer. The lowest beans are formed at a height of about 35 cm, without touching the ground. The grains are shriveled, yellowish in section. In each pod there are 6-8 pieces.
- Zhegalova 112. A variety that has proven the undeniable merits of more than one generation of gardeners. It is a medium late ripening pea. Beans reach technical ripeness in 50-60 days after germination, fully ripen in 90-110 days. The stalk is quite high (120-180 cm), with long internodes. The plant will definitely need support. Beans are almost straight or with a barely noticeable bend, the tip is dull. The average length is 10-15 cm, the diameter is 2.3-2.5 cm. Each pod has 5-8 seeds. They have an irregular rounded-angular shape, they are slightly flattened at the hem. Painted green with a grayish tint. Harvest ripens en masse.
- Sugar girlfriend. A variety from the mid-early category. The growing season is 65-70 days. The height of the stem is 130-150 cm. Beans with a more or less pronounced bend, short (7-8 cm), of different widths. The lowest ones are formed at a height of 70 cm. There is no “parchment” layer. The grains are medium-sized, wrinkled, pale yellow at the cut. Each pod has 6-8 pieces. Compared with other varieties, it is characterized by a higher protein content (about 25%). Its other advantage is resistance to fungal diseases, including all types of rot.
- Sugar Oregon (also found under the name Oregon Suga). A variety from the mid-season category, the crop ripens in 55-70 days, the fruiting period is extended. The stem is not particularly long (up to 1 m), but when grown under optimal conditions, it can stretch more than is convenient at home. Beans with a slight bend and a blunt apex, elongated (9-10 cm), as if flattened. In each of 5-7 peas. The "parchment" layer is not very noticeable, but present. Nevertheless, peas can be eaten with a pod. Taste is very good, the variety is considered delicious. Grains of medium size, light yellow on the cut, the surface is slightly wrinkled. Aeration strongly influences productivity, therefore the room needs to be regularly aired.
- Children's sugar. A variety from the mid-early category. The stalk is medium length, about 95 cm. The beans are wide, with a slight bend, the tip is pointed. The parchment layer is missing. The lower pods are formed at a height of 30-35 cm. The taste is very good, the peas are soft and sweet. The surface of the grains is wrinkled, on the cut they are yellow. The variety is unpretentious in care, appreciated for a consistently high yield.
- Inexhaustible 195. A variety from the category of medium early, technical ripeness reaches in 45-60 days, full maturity - in 70-90 days. Stem with long internodes, height varies from 75 cm to 115 cm. Beans with a barely noticeable bend or completely straight, the tip is dull. Sometimes there are "constrictions". The length of the bean is 8-10 cm, the diameter is 1.5-1.8 cm. Each pod has 6-7 peas. Grains of lime color, when overripe, turn yellow. The shape is irregular - they are round-angular, slightly flattened.
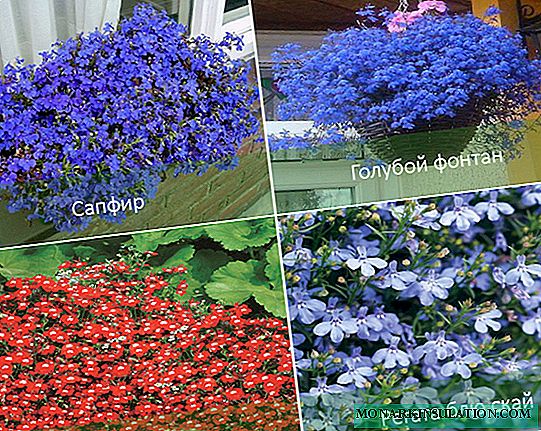
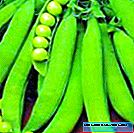
Photo: Sugar pea varieties suitable for growing at home

- The Ambrosia pea was bred relatively recently, but has already managed to prove itself from the best side


- Peas Zhegalova 112 successfully passed the test of time


- Peas Sugar girlfriend - one of the novelties of the Russian selection


- Peas Sugar Oregon cannot be called sugar in the full sense of the word - the "parchment" layer is still present, albeit slightly pronounced

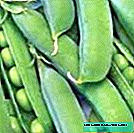
- Sugar peas are appreciated for excellent taste

- Inexhaustible peas 195 stands out with unusual lime color grains

On the windowsill you can grow peeling peas. He only uses grains for food, the beans themselves are inedible.
- Oscar. Pea variety comes from the Czech Republic. Belongs to the category of ultra-early. Harvest ripens in 42-45 days. The stalk is quite short, about 70-80 cm. The beans are long (9-12 cm), strongly curved, the tip is pointed. In each of 10-12 peas. The lower beans are formed at a height of 40 cm. Grains that have reached technical maturity, green, at the cut - pale salad. The shell is very wrinkled. The variety is resistant to diseases, especially to Fusarium wilt. Harvest ripens together.
- Adagum. The variety is classified as mid-season. Harvest ripens in 68-73 days. The stalk reaches a height of 70-80 cm, internodes are short, there are few leaves. The presence of a well-developed mustache is characteristic. Beans are quite short (7 cm), without bending, with a pointed top, rich green color. Each pod has 6–9 peas. Usually one plant brings 12-16 beans. The grains are medium-sized (or closer to large), dark green, lime on the cut, wrinkled skin. The variety demonstrates good immunity to powdery mildew and ascochitosis, but has no absolute protection.
- Early Gribovsky 11. Technical maturity occurs in 54-63 days after emergence, full - in 66-73 days. Stem with short internodes, its height reaches a maximum of 35-40 cm. Beans are flat or with a slight bend, dark green. The average length is 8-10 cm, the diameter is 1.2-1.4 cm. Each pod has 6-8 peas. The grains are round-angular, slightly flattened. As they mature, they change color from green to yellowish. Fruiting friendly. The most dangerous disease for the cultivar is ascochitosis.
- Hawsky pearls. A variety from the mid-season category, gardeners have been growing it for more than twenty years. The ripening process takes 55-70 days, fruiting is friendly. The height of the stem is 78-97 cm, with a total of 18-20 internodes, and beans begin to form at the height of the 11-14th. Beans with a slight bend, the tip is pointed. The average length is 7-8 cm, the diameter is 1.2 cm. Each has 5-9 peas. The grains are not particularly large, almost one-dimensional, glossy, in the form of a cube with rounded corners, painted in lime color, on the cut white and yellow. The variety is appreciated for its good resistance to all types of rot.
- Vera. A variety from the category of early ripening. Harvest can be removed 48-63 days after seed germination. By this time, the beans have reached technical maturity. Peas are recommended for canning. The height of the stem does not exceed 55-65 cm. Beans are straight or with a barely noticeable bend. The length is 6–9 cm, and the diameter is 1.2–1.4 cm. Each contains 6–8 grains. The parchment layer is very pronounced. As it ripens, the color of the pod changes from salad green to lime. Peas are not particularly large, irregular roundish-angular, yellowish, very wrinkled, one-dimensional. The variety is often infected with ascochitosis.
- Sunrise. Peas reach technical maturity in 67 days. Stem height - 65-75 cm. Beans begin to form at a height of 18-20 cm. Leaves and stipules are dark green, medium in size. The parchment layer is clearly visible. Peas are bright green, lettuce on the cut, slightly flattened vertically, the surface is wrinkled.
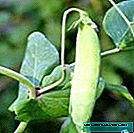
Photo gallery: common varieties of peeling peas

- Pea Oscar brings one of the first crops

- Adagum peas well resists diseases, but has no absolute immunity

- Peas Early Gribovsky 11 is characterized by massive fruiting


- Hawa pearls are relatively rarely affected by rot


- Pea Vera - A Very Popular Early Variety


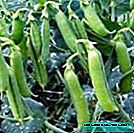
- Pea stem height Sunrise makes it suitable for growing at home

Preparing planting material
Preparation for growing peas at home begins with the selection of quality seeds. They are the key to a plentiful harvest in the future. You can buy or assemble them yourself. They retain germination for two years.

The first stage of pre-planting preparation of pea seeds - visual inspection
First of all, the peas are sorted and carefully inspected, discarding those that have obvious defects - violation of the integrity of the skin, other mechanical damage, spots that resemble traces of mold and rot, non-standard sizes and shapes, and so on.
The remaining seeds in 10-15 minutes are immersed in soft water with the addition of salt (20 g per liter). If there is no melt or rain, the usual tap will do. But it will have to be defended for at least a day, waiting for a precipitate to resemble a grayish-white flake. You can also add a few drops of apple cider vinegar or crystals of citric acid. Those peas that float to the surface can be thrown right away. Unusual lightness means the absence of a fetus. Such seeds will not give seedlings, it is obvious.

Soaking pea seeds in saline allows you to reject those that obviously will not germinate
Peas that have passed the test for potential germination are prepared for germination. The grains extracted from the saline solution are washed in running water and allow its excess to drain by spreading them on linen napkins or cotton towels. Then they are soaked in a solution of potassium permanganate bright raspberry color to prevent the development of fungal diseases. Water with the addition of boric acid (0.1 g per 0.5 l) is also suitable. The procedure in the first case lasts 6-8 hours, in the second - 15-20 minutes.

Potassium permanganate solution - one of the most affordable disinfectants
After that, the peas are washed again and kept for 4-6 hours in plain water, heated to a temperature of 40-45ºС. During this time, it is advisable to change it at least once or twice, because it cools down. After the designated period, they are removed from the water and dried.
The final stage of preplant planting is germination. A piece of cotton cloth or cotton wool is moistened with water and slightly squeezed so that it does not drip. To accelerate the process, a biostimulant can be added to the water. Both purchased drugs (Epin, Kornevin, Heteroauxin, potassium humate) and folk remedies (aloe juice, honey, succinic acid) are suitable. Seeds are laid out on this fabric and covered with the same piece on top. It is undesirable to use gauze. The emerging seedlings are confused between the strings; it is practically impossible to extract them from there without breaking it. And paper napkins very quickly spread into porridge, because the material will have to be constantly moistened as it dries. Under no circumstances should this be forgotten. If the fabric dries, the seeds will simply disappear.

If you wrap pea seeds in gauze, the sprouted specimens will be very difficult to extract from there without damaging
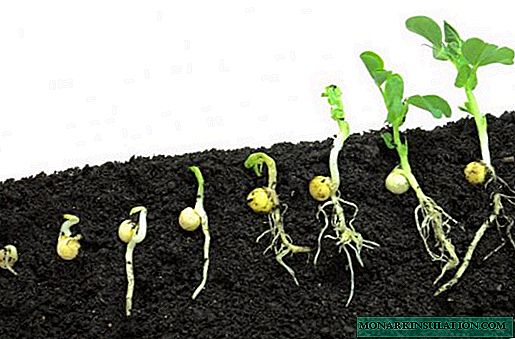
The resulting "bundle" is placed on a plate and put in heat. For example, a heating battery or a window sill illuminated most of the day is suitable. Seeds are ready for planting, in which the sprout has reached about a centimeter in length. They hatch somewhere in 2-3 days, the whole process takes 5-6 days. Such peas give seedlings 4-5 days earlier than unprepared.

Sprouted pea seeds show a faster and better germination rate than unprepared
The procedure is carried out in such a way that the seeds can be planted in the soil immediately after it. They do not even need to be dried.
Some gardeners recommend just pouring peas with warm water. But in this case, those who do not have much experience can easily spoil the planting material. If bubbles appear on the surface of the water, this means that part of the seeds died due to a long stay in it. Usually enough nights, and in the morning peas can already be planted. They will swell, but will not germinate. Accordingly, the appearance of seedlings will be delayed.
Video: preplant seed pea preparation
How to grow peas at home on the windowsill: optimal conditions
There are no special requirements for the growing conditions of peas. But it is advisable to familiarize oneself with the “wishes” of a culture in advance in order to create an optimal or close microclimate for it. Only in this case is it possible to obtain a plentiful harvest.
Peas are one of the most cold-resistant garden crops. This quality is preserved when grown at home. The plant feels great at a temperature of 16-18 ° C, so the pots in spring and summer can be safely taken out to the balcony, even unglazed. But pea tolerates heat relatively poorly. At 25ºС and higher, the process of plant development is strongly inhibited, as if it falls into "hibernation". This negatively affects future yields. Therefore, at home, it is undesirable to plant grains in June or July. These are usually the hottest months. The critical minimum for the culture is approximately -5ºС.

At home, peas must necessarily get enough light.
Peas refers to plants of long daylight hours. For normal development, plants require a minimum of 12 hours of light during the day. In summer, pots are put on the windowsill of a window facing south, southeast, southwest. If the sun is not enough (and in most of Russia it is, especially in winter, late autumn and early spring), artificial light sources will have to be used. Both special phytolamps and conventional ones (luminescent, LED) will do. They are placed about half a meter above the bowl with peas, on top, at a distance of about half a meter, at a slight angle.

Phytolamps help provide daylight hours of the required duration.
Pea has a very positive attitude towards fresh air; it is not afraid of drafts. Therefore, the room must be regularly ventilated. Useful for him and spraying, especially in the heat. You can increase the humidity in the room in other ways - place more plants in the room, place pots with cool water, put wet pebbles or expanded clay in the pan, buy a special device.
The root system of peas is developed, the presence of a powerful core root is characteristic.When grown in open ground, it goes into the soil about a meter. At home, this, of course, is impossible, but you still have to pick up a deep, spacious container resembling a bucket for culture. In flat pots there is too little soil, this can provoke overheating of the roots and a sharp decrease in productivity. The preferred material is natural ceramics. It provides normal aeration and does not allow moisture to stagnate in the soil.

The pot for growing peas must be deep and voluminous
Pea substrate prefers nutritious, but at the same time quite light. Regardless of whether you buy soil or mix on your own, the composition must necessarily contain baking powder - coarse sand, perlite, vermiculite, crushed dry moss-sphagnum, coconut fiber, straw.

Shredded dry moss-sphagnum gives the soil the required friability
Another necessary component is humus or rotted compost. It will provide the mixture with the necessary nutritional value. Never use fresh manure. It saturates the soil with nitrogen, peas, like all legumes, has a similar property. And an excess of this macroelement negatively affects the immunity of the plant, contributes to the active formation of green mass to the detriment of flowering and fruiting.

Humus helps increase soil fertility
To the humus and baking powder, taken in approximately equal volume, add as much ordinary land. You can use the soil from the garden (best with the one on which any Solanaceae or Pumpkin were grown before), a purchased universal substrate for seedlings or indoor plants, forest soil. The latter is best taken from under any deciduous trees, except for birch.
Any soil must be sterilized before use. The easiest way is to put it on for several days on an unheated balcony in the winter or hold it in the freezer. Other methods are roasting or steaming.
Pea varieties, the stem length of which does not exceed a meter, do not need support. Just to be safe, they can be allowed to curl around a support made of bamboo. They are sold in any store with indoor plants.

Support for undersized peas can be built on their own or just buy
If you choose a more "overall" variety, you will have to build something resembling a trellis. The simplest option is several vertical supports and horizontally strong threads stretched between them, fishing line or thin wire. The optimal mesh size of the resulting mesh is 10 * 10 cm. Being correctly placed, it performs not only a utilitarian function, but also a decorative one. Such a "green screen" looks very unusual and original. Just don’t put the pea-wrapped net close to the wall. Under such conditions, normal air exchange is not possible.
Seed Planting Procedure
Prepared pea seeds are planted in a common container, wide and shallow. If you immediately provide each of them with an individual large capacity, there is a high risk of acidification of the soil and the development of rot. In principle, planting in plastic cups or peat pots is permissible, but then you still need a pick. The root system of peas is simply not enough space.
Directly in the landing procedure there is nothing complicated. They operate according to the following algorithm:
- The containers are filled with disinfected soil, moderately watered and leveled. 3-5 cm should remain to the edge of the container. If there are no drainage holes, they must be done independently. Drainage at the bottom is desirable - a layer of fine expanded clay, crushed stone, pebbles, brick chips about 2 cm thick.

Initially, pea seeds are sown in common containers.
- Seeds are sown in grooves with a depth of about 2 cm. The interval between them is 5-7 cm. The row-spacing is 7-8 cm. The peas are laid down sprout. Furrows are sprinkled with soil, without ramming it. Then the soil is moistened again by spraying from a spray bottle. The container is covered with glass or a piece of polyethylene, turning into a greenhouse. Before the emergence of seedlings, peas do not need light. However, regular watering is required as the topsoil dries and daily airing. It is enough to remove the shelter for 10-15 minutes to get rid of the accumulated condensate.

Pea seeds are planted in the soil when planting so that the shoot is pointing down
- After the seeds germinate, the shelter is removed. The culture is provided with daylight of the required duration, naturally or artificially. The optimum temperature is 18-20ºС. Regular watering is still important. Do not let the soil dry. About a week after emergence, the first top dressing is carried out, pouring peas with a solution of simple superphosphate (2-3 g per liter of water).
Prepared pea seeds germinate fast enough
- In the phase of the second true leaf, seedlings dive. They are seated in separate containers with a volume of 0.3-0.5 liters. You can reuse one common box, but it should be large enough. The optimal distance between plants is at least 5 cm. The soil is used the same as for germination of seeds.
- They are removed from the old container along with a lump of earth on the roots, trying to minimize its integrity.
- Seedlings are planted in holes about 5 cm deep.
- For 4-5 days after the dive, the peas are kept in partial shade, protecting from direct sunlight.
- Seedlings that have reached a height of 12-15 cm are tied to a support, if necessary.

Pea seedlings after a dive, if necessary, tied to a support


Further plant care and harvesting
Pea care is uncomplicated, both in the garden and at home. The main component of agricultural technology is proper watering. It is also important that the soil in the pot is regularly loosened, it provides fresh air access to the roots and prevents the soil from souring.

Loosening the soil is necessary when growing peas in a pot on the windowsill and in the open ground
Most varieties begin to bloom a month after planting seeds in the ground or even a little earlier. Harvest ripens in another 20-25 days. For many sugar varieties, this period is reduced to 10-15 days. There are no problems in order to start fruiting. Pea is a self-pollinated culture; it copes with this task perfectly without any outside help.

Pea fruits even in captivity are tied without assistance
Before flowering, it is enough to water the plants twice a week if the weather on the street is optimal for the crop. As soon as the buds open, the intervals are reduced to two days. In the heat, even daily watering and additional spraying may be required. In any case, use only soft water warmed to room temperature.
It’s easy to determine whether it’s time already or if it is worth the wait - the soil from the top layer, when rubbed in the fingers, feels “prickly”, it does not work to compress it. Each time, about half an hour after the procedure, when the moisture is already absorbed, the soil is loosened to a depth of about 5 cm.
Pouring peas is strongly discouraged. This compacts the soil, making it difficult to aerate. The risk of developing fungal diseases also increases.
Apart from top dressing, carried out before the dive, it is enough to apply fertilizer three times during the period of active vegetation to peas. The first time the procedure is carried out immediately before flowering, the next with an interval of 12-15 days. A nutrient solution is prepared by dissolving 1.5-2 g of simple superphosphate and potassium sulfate in a liter of water. There are also special fertilizers for legumes that can be bought at any specialized store without any problems. They do not contain nitrogen, which the plant saturates the soil on its own.

Fertilizers for Legumes do not contain nitrogen - plants produce this macroelement independently
Those who prefer natural top dressing can use sifted wood ash in dry form or make an infusion from it.
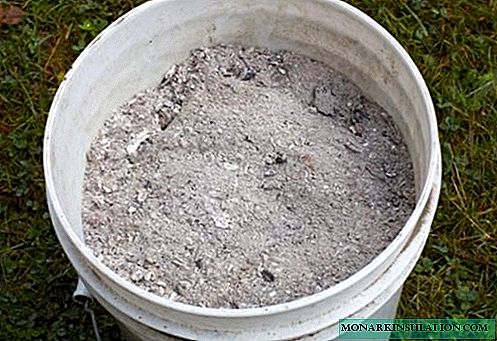
Wood ash - a natural source of potassium and phosphorus
Video: planting peas and further care for the crop
Beans are removed as they ripen. The diameter of the grains in a state of technical maturity is at least 6-7 mm. Ripe beans left on the plant inhibit the formation of new ovaries.
Regular picking of ripening beans stimulates the appearance of new ovaries, thereby increasing yield
The first to ripen are the pods located below everything. Fruiting in most varieties is extended, lasts about two months. During this time, 0.5-0.8 kg of beans are removed from one bush. They are carefully cut with scissors or a sharp knife. Do not pull, twist or pull the pods. It is very easy to cause significant harm to the plant itself.
A sign that the fruiting period is ending is a coarse stem. But you can extend it a little by removing all the leaves from the lower half and pinching the top. This procedure stimulates the appearance of new processes.
If you have a garden, don't just throw away the prolific plants. Cut tops are thrown into a compost pile. And the crushed roots are an effective and absolutely natural fertilizer, a worthy alternative to manure and humus. It not only increases the fertility of the soil, but also improves its texture.
Peas are rarely ill at home quite rarely, and with proper care - almost never. The most dangerous disease for planting is powdery mildew. At the same time, it is undesirable to use chemicals to combat the fungus, they are deposited both in the soil and in the beans themselves. The first symptoms are a powdery grayish-white coating and blurry yellow spots on the leaves. Gradually, the “flour” darkens and as if thickens, the affected tissues turn brown, dry and die.

Powdery mildew is one of the most common fungal diseases affecting both indoor plants and garden crops.
For prevention, several crystals of potassium permanganate are periodically added to water for irrigation, and crushed chalk or sifted wood ash is planted into the soil during planting. To cope with a disease detected at an early stage, enough folk remedies. Peas are sprayed with a solution of colloidal sulfur, mustard powder, diluted with water in a ratio of 1:10 kefir or whey with the addition of iodine, infusion of onion or garlic arrows, wormwood. As a rule, 2-3 treatments with an interval of 3-5 days are sufficient. In the absence of effect, fungicides of biological origin are used (Strobi, Alirin-B, Tiovit-Jet).
The second common disease at home is root rot. Often it develops due to regular waterlogging of the soil. It is also dangerous because the fungus parasitizes on the roots for a long time, the aerial part of the plant looks healthy. And when the stem begins to blacken and soften, it becomes slimy to the touch, the soil is drawn in by a layer of mold and spreads the smell of rot, it is too late to save the plant. It must be destroyed as soon as possible - this is the source of the spread of the infection. Preventive measures to prevent the development of root rot are the same as those recommended for the preventive fight against powdery mildew.
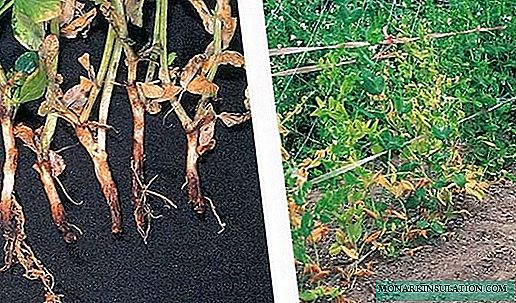
Obvious symptoms of pea root rot appear only when it is too late to save it - the development of the disease has gone too far
Video: the experience of growing peas at home
Peas are not only tasty, but also very healthy. Therefore, it is difficult to find a garden plot that does not have at least a small garden with it. But grains that are loved by both adults and children can be enjoyed not only in season. The preparation of peas for planting is similar to that of seeds intended for open ground. Directly in planting in the ground and further care for the crop there is nothing complicated. In fact, the latter consists in loosening the soil, watering and applying fertilizers.